Tuesday, November 29, 2011

Winter List

No boat is ever finished, and I have my list for the winter....


  • Brass rubbing strips on the rudder, centreboard and the front of the hull
  • Cargo Netting for bits and pieces
  • Fix the bow eye, it was too small and it bent
  • Add a nose wheel to the launching trolley
  • Add a winch to the trailer or trolley. This needs some thought, I want to make it easier to get the boat onto the trolley and the trolley onto the road trailer.
  • Wooden Trim where the hull joins the deck. More sanding.
  • Reapply oil to the seats, coamings etc.
  • Put the wooden bungs in the screw holes in the coamings.
  • Lazy jacks / topping lift
  • See if I can improve set up time for the mast / sails. I think if I have something to support the stern while on the trolley, I can raise the mast by hand. We shall see.
  • A mount for the GPS
  • Bilge pump (or pumps) that I can use on either tack.
  • A better way of stowing the outboard while towing.
There. Now I have a list.

It's longer than I thought it would be, but it'll get longer yet, lists always do.

Sunday, November 06, 2011

Sailing in November

My wife's family is from Cavan, and my parents have retired there too. So, on Friday we drove to Cavan, with the boat in tow. While my wife and the children visited her parents, I met my parents at the lake with the boat. (Thank you my love for the time you give me to sail.)

The lake was up about 4 - 6 feet over it's banks, which meant the car park was flooded to 18 inches. So I had to push the boat and trailer right through the (bitterly cold) water in the car park to get deep enough to launch it.

I'm now in my 40s, so Mom's claim to being 21 is not looking good, but she rolled up her trousers and waded knee deep into the lake to climb on board.

Her father was a Ship Builder in Arklow, and this was her first time going out sailing in a boat built by her son. The world turns.

It was also only my third time out in the boat. So her faith in me may be misplaced.

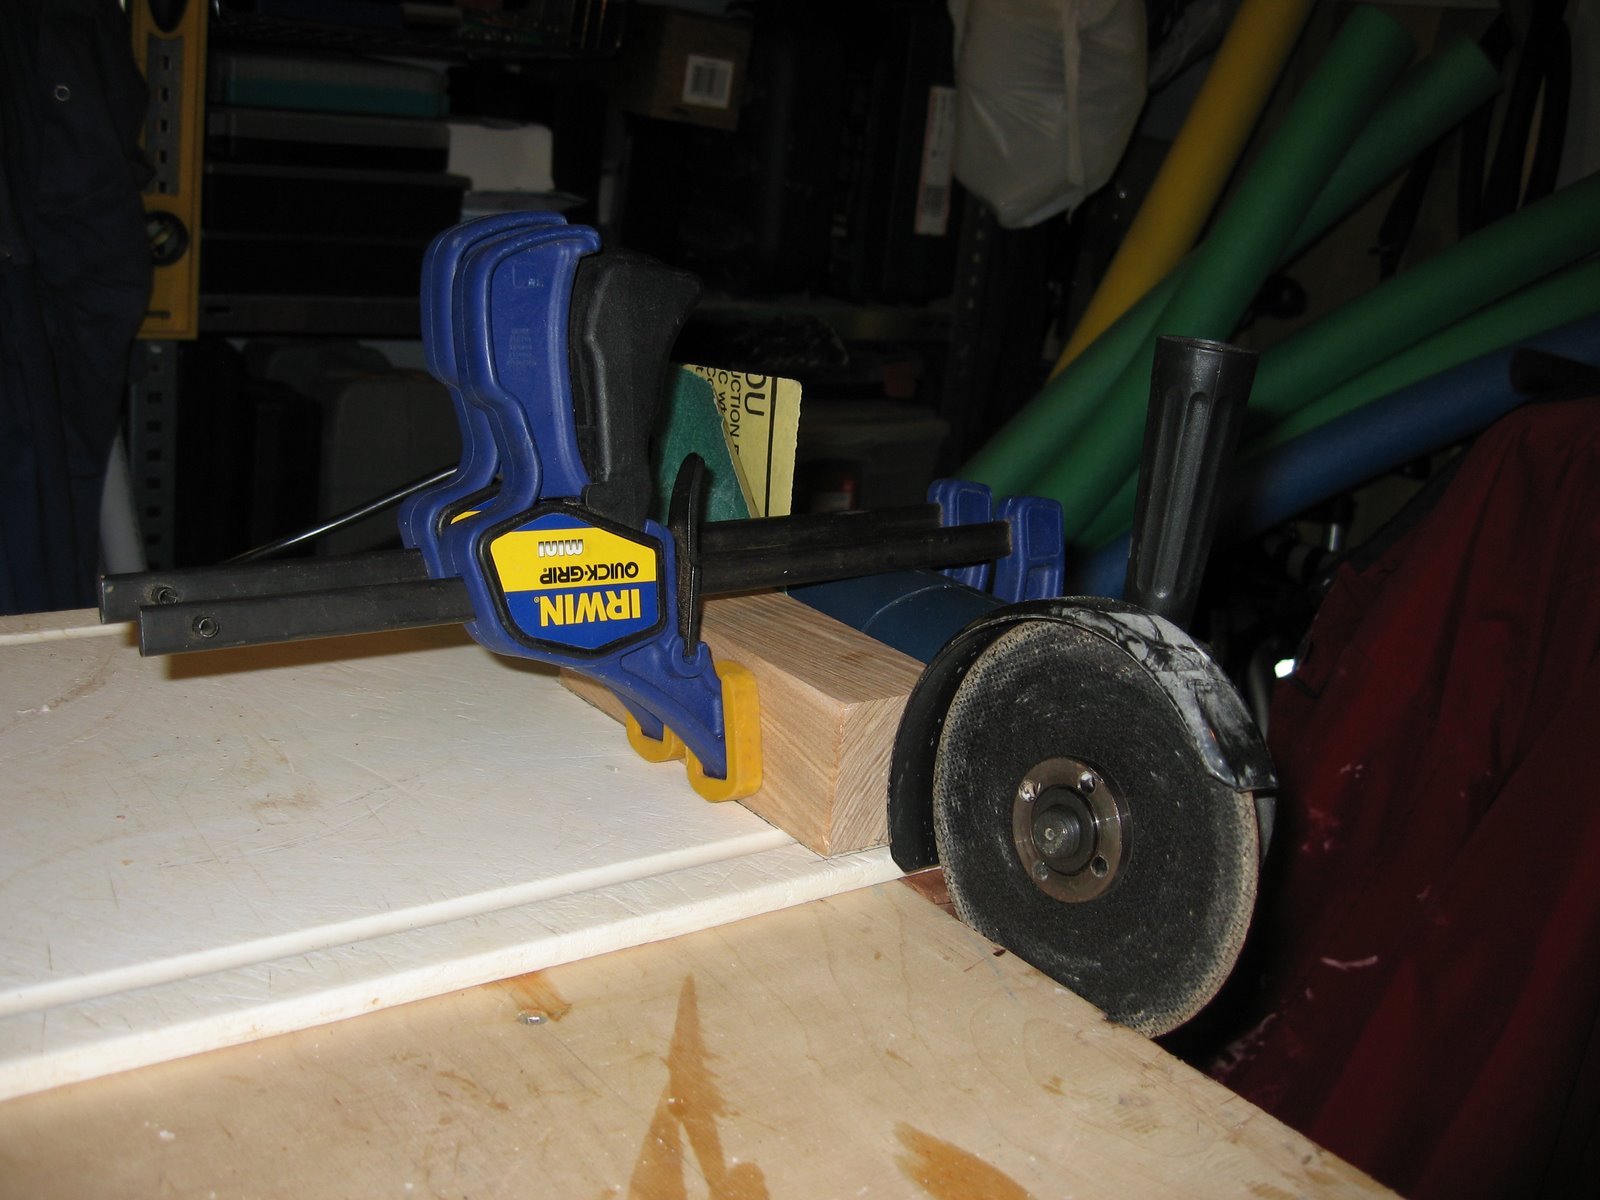
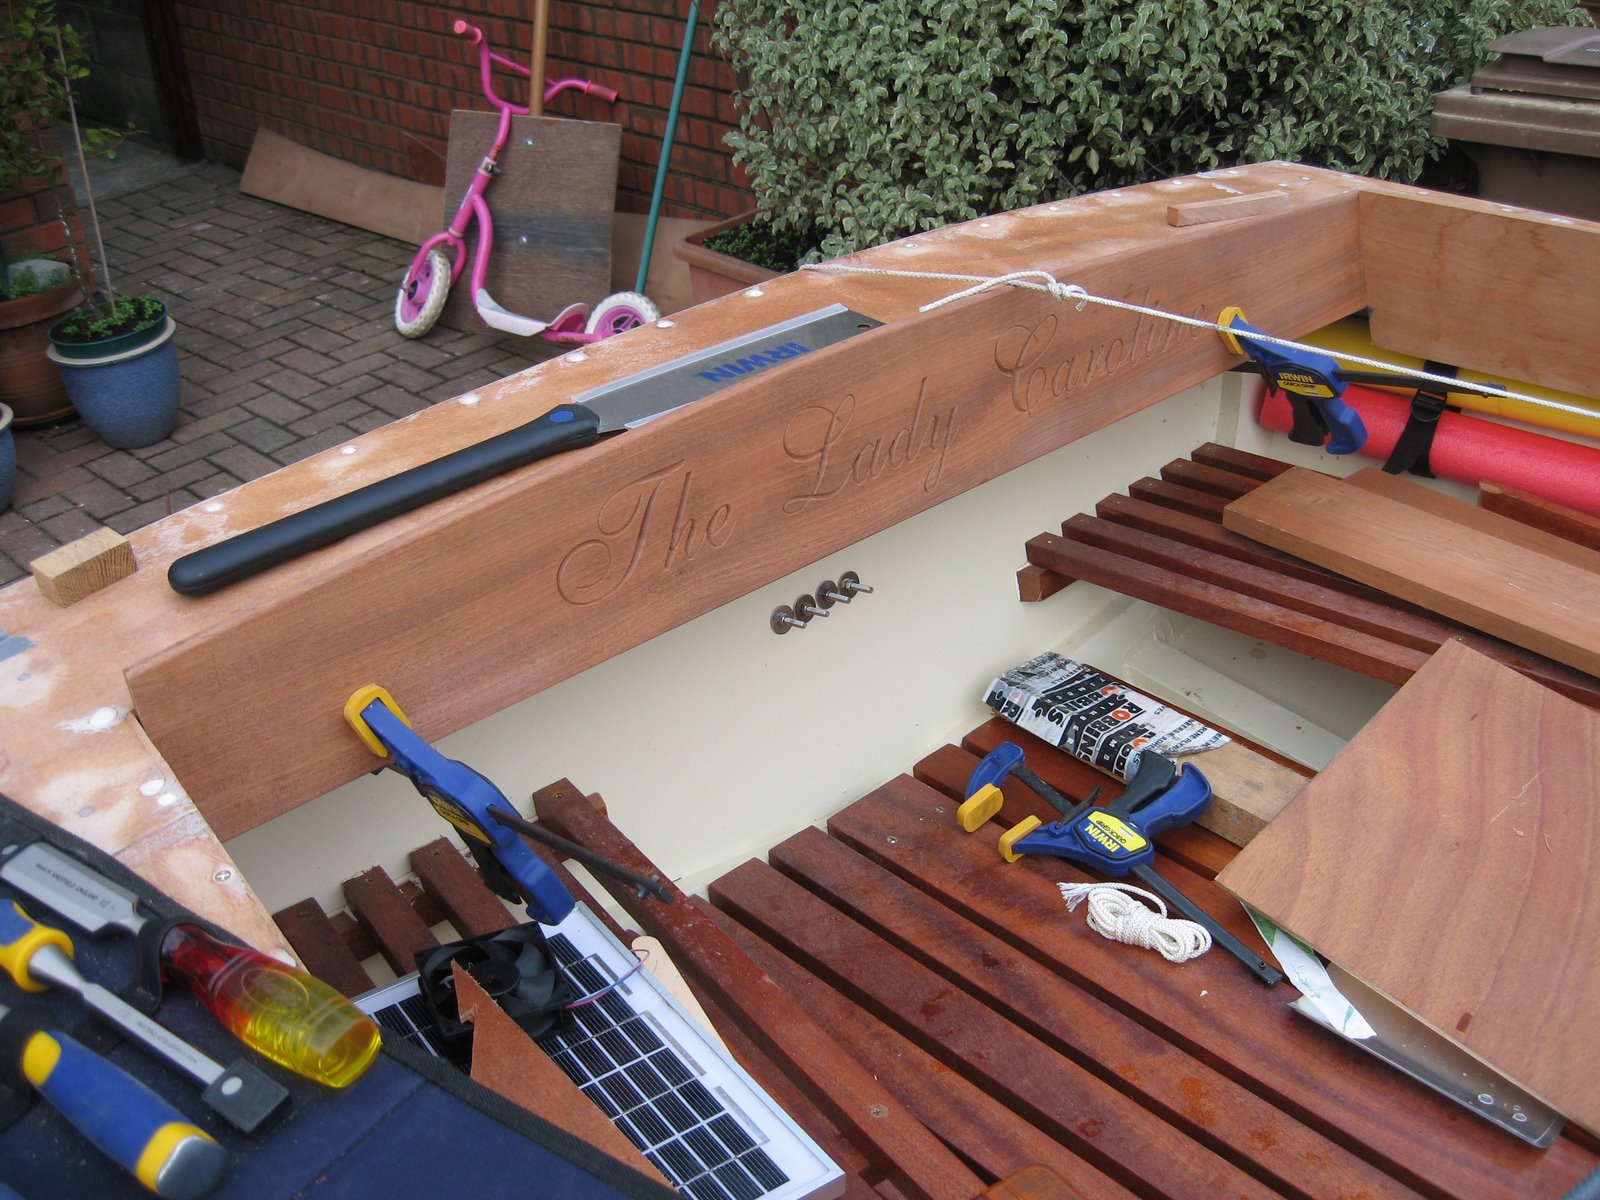
Using an A Frame, an open hinge, and temporary, sprung stays, I've hugely simplified hoisting the mast and setting up the boat, but it still takes about an hour. This time, I rigged the Jib for the first time. Up to now I'd only be flying the mainsail.

The lake was divided into regions of small waves, ripples, and of glass, depending on the lay of the land, and the shelter of the trees.

As you can see the lake is somewhat convoluted.


View Larger Map
Our journey went from the Bridge marked A above to the turn in the lake and back. Hardly an epic voyage, but an adventure nonetheless.
For the first time I popped up the Jib. It's on a rolling furler, and it was far easier to fly it and later stow it again than I'd expected.

Mom took the helm for a while, and we generally took it easy. In spite of it being the start of November, it was surprisingly warm, and the sky was blue, barely dotted with clouds.

At one point we tacked back and forth a few times to clear a copse of sunken trees whose crowns were barely half clear of the water. With a pivoting centreboard, and pop up rudder, I fear no shallows, but tangling with those trees could have left us stuck, but in deep enough water that getting out to push off was not an option.

I had not turned on the GPS so I've no idea how fast we were going. It was light enough air that we could sit one each side and sail without any concern of capsizing. There was a noticeable increase in speed when we flew the Jib. At times we "flew along", but when we passed through the shadows of the trees, we had to look at our wake to be sure we were moving at all.

The return to our launch site was narrow, close to the wind, and in shelter. After slowing to a halt and drifting back and sideways twice, I relented and used the outboard engine to take us in to where I could jump out

I'd like to say a big thanks to my father, who in spite of not having any wish to board any boat which is not large enough to have a choice of restaurants, did help me set up and tear down the boat, and sat reading in the car awaiting our safe return.

These lakes will be my sailing grounds for a while, and there's more than enough to explore. As the kids get older, there's plenty of "pirate coves" and "magic islands". I think I'll need to order "The Swallows and The Amazons".

Monday, September 26, 2011

A new toy

I picked up a Ceramic Folding Knife on the internet. $49 + $5 postage - from Canada to Ireland. Nice, usually postage makes things like that prohibitively expensive.

You can see them at http://www.ceramicknife.org/


It's about as sharp as you will make a steel knife without taking a strop to it. That is it slices paper like all the demos you see on youtube, it won't shave the hair off the back of your arm, but, it will slice through 8mm poly double braid without any fuss at all. (Which is more important than shaving your arm bald!)

The handle is stainless, the blade is ceramic. It's held together with tiny recessed bolts, so you can take the whole thing apart if you even need to. (Not that there's anything to go wrong).

It clicks closed, so it won't pop open accidentally. And it locks open.

It feels light, but not in any way flimsy. It takes a little practice to pop it open without your thumb getting too close to the blade, it sort of pops, and your thumb can slip of the stud. The blade is only an inch wide, if the back of the blade was a bit wider, there'd be more room for the thumb stud.

On the whole a very nice toy. I can't help thinking my modified Myrchin will still be my go too knife on the boat, 'cause I know it's bullet proof. But I suspect that this one will have it's place too. I just want to see how resilient it is.


But on the whole nice toy.


Sunday, September 25, 2011

Cutting Rope

I have a Myrchin P300 knife. It's really quite nice. But the serrations are very aggressive.
This means that

  1. It catches in the rope if you try to cut rope.
  2. I can't sharpen it very well (ymmv)
  3. At the end of it all, I take 3 serious attempts to cut 8mm double braid.
I have a small Leatherman and it has a plain blade and a serrated blade.  The plain blade will take an edge which cuts through 8mm double braid like it was wet tissue. The serrated blade, having shallow scallops, does the same, and is easy to sharpen. But it's fiddly to open, needing two warm dry hands.

So I got out my coarse diamond stones, and ground down the serrations on the Myrchin until they were less like a comb! Then I sharpened it (with a spyderco sharpmaker), and just because I could, I honed the blade on a cheapo cloth wheel powered by a drill with some polishing compound.

My Myrchin now cuts through the 8mm poly with callous disregarding ease. It sits nicely in my pocket, it has a pliers, and a locking marlin spike. And now it has the blade that I'd have put on it. It does not look nearly as scary as the original blade. But when your hands are cold, you are tired, and something is tangled, if you want to "untangle" it, you don't care much for how scary the blade looks.

Monday, September 19, 2011

Well that didn't suck !

The wooden pump sucks water just fine, provided that it's either in water, or primed. It won't self prime more than about 3" or so. I could see the water climb about 3" through the clear plastic hose. No More.

I guess that while the clearance of the piston, and the valves was just fine for water, air just flows past them. I could do a better job, and add seals, and improve the valves, but now the engineering is starting to get to the stage where it's very time consuming, and fragile.

So, I'm just glad that I only made a mock-up, and did not spend a lot of time making it pretty.

Oh well.

Some you win.

Monday, September 12, 2011

A wooden Pump

I can't claim credit for this, I found it here at duckworks (thanks By Tim Ingersoll - Superior, Wisconsin - USAbut I thought it would look a lot better on my boat than a grey / black plastic thingy.

I cobbled one together out of scrap plywood to see if it simply functioned. I didn't want to spend a lot of time and effort and expensive wood to find out that it trickled water out, or had to be made to perfect tolerances.

It was easy to make, it moves LOTS of water with very little effort. It does splash water out the top where the handle comes out, so I need to try to make a "seal" there with rubber.

I need to try it with a pipe out the bottom to see how well it primes, but I think I will be putting my whale gusher urchin up on ebay shortly.

If it will self prime well enough, I see one each side of the boat, with a pipe to the other side, so that I can pump out the boat while I'm on the windward side.

Photos and test results for self priming to follow. But I've a Math project to hand up, so it may be a little while.

Monday, August 29, 2011

Some things that I wish I had known before I started.

Don't underestimate the importance of setup time on a small boat. Sloops have tall masts, which are more effort to build, set up, and store. Gaff / Lug rigged boats have multiple, but smaller spars. Often fitting right inside the boat itself for storage / trailering.

Every Cotter Pin you need to put in place, with a tiny, fiddly split ring takes more time, especially with cold tired hands. (And bring lots of spare cotter pins, in every size, and lots of split rings)

The more open space in a boat, the more water it can take on. Boats with seats which are storage / buoyancy compartments take on a lot less water than simple park bench seats. I may, over the winter refit my seats, it will be a lot of work, but it would give me tremendous extra buoyancy and storage, and massively reduce the amount of water I'd have to bail out in a swamping.

I should have turned the front frame into a bulkhead. The space forward,  is more or less useless to me. It's too far forward to store anything. It's now filled with a GYM ball as buoyancy. With a bulkhead, and an pair of waterproof, lockable access hatches from the deck, it could be used for storage of light, infrequently needed items. And it would still represent a lot of buoyancy.

I should have bought a trailer with room for a winch. Pulling the dolly up onto the trailer is awkward, and when you haul at it, it can come flying forward. A winch would be far more controllable

I should have turned the frame just under the fore deck into a bulkhead, and put in large hatches. Lockable storage !! Dry storage !! More stuff that I could leave on the boat, ready to go, rather than have to keep it in the house/shed. Again, a shorter "time to water"..

Sunday, August 21, 2011

Quick Sailing Clip

Ok, so I need a whole lot of practice.


  • To get off a shallow lee shore, stick one foot on board, hold the tiller centred, and shove a few times with your other foot like you were on a child's scooter.
  • Don't lower the mast in a cross wind. Really, Don't 


Saturday, August 20, 2011

A little better....

It's amazing how much better she sails with a functional centreboard. Gravel is a bad thing for pivoting centreboards.

On our second trip, a quick spin around some lakes in Cavan, was a whole lot better. The engine remained unused. I sailed a short loop on my own to ensure all was well, then took Sarah and Abigail each for a spin, under sail.

I remembered reading an article where a sailing Uncle strongly advised short trips, far better to have the kids complaining about going home too soon, than sitting there frowning, saying are we going home yet.

My sailing skills are currently the limiting factor, but with just the main, in a light breeze, she scooted along at just shy of 4 knots. Almost exactly 4 miles an hour, so about walking speed.

I am reasonably sure that any competent dinghy sailor would cringe at the rudimentary mistakes I was making, but hey I have a boat now, I can learn.

Oh yes, the kickup rudder, worth it's weight in gold. I cannot imagine the damage I would have done by now, beaching TLC several times, only to hear the sharp Snap of the auto- release-cleat opening. I certainly would not have been able to lift the rudder, while trying to steer the boat, and manage the sails. Perhaps with a few years practice, but for now, thanks Duckworks!!

http://www.duckworksbbs.com/hardware/cleats/sd002570/index.htm

Tuesday, August 16, 2011

The Launch Video

Ok, so not quite a master class in sailing, but she floats, she sails, and she motors.


Ready to rock

A quick snap of the boat on her trailer


Monday, August 15, 2011

Not quite a Master Class in sailing....

On Sunday I launched The Lady Caroline.

I had the assistance of Ben, and the patience of his whole family who came along to join us.

The boat floated, upright, and no-one drowned.

We even got to the stage where we were confident enough to bring his kids for a spin around the estuary with the sails down, just running the outboard.

Before much more ado, A HUGE Thanks to Ben and Family. Ben and Sarah's patience when they got a lot more than he bargained for was nothing short of astounding.

We did make some pretty good decisions, which resulted in my poor decisions not getting out of hand.

  • We launched in a sheltered estuary.
  • We brought an anchor, chain, and rope
  • We had an outboard.
We also learned


  • It took a LOT longer to setup and tear down than I expected.
  • Gravel makes a bad launch place for a sailboat with a swinging centreboard.
  • When the CB is stuck up because it's jammed with gravel, you cannot sail upwind, in fact, you cannot even turn upwind, you have no pivot point.
  • Leaving a hole in the CB case cover so that you can push down the CB is a good plan
  • Forgetting to bring a long thin stick to push down the CB is not.
  • An outboard helps when you can't sail
  • Too much choke is as bad as too little.
  • An anchor allows you to STOP and think and fix things without panic.
  • The concrete wall long beside the slip continues underwater a lot further than you'd think.
  • Old fashioned boats without a plumb bow tend to ride up on underwater concrete walls without too much damage.
  • Self-bailers are no good if you can't reach them without lifting the floorboards.
The suzi 2.5hp was more than enough power, but the movable bracket is set too low, so part of the bracket drags in the water. Not a big deal, but annoying, I need to sort that.

We did get a little sailing done, a broad reach with the mainsail reefed.

All in all, a success, but I need a LOT of practice sailing.

Video Clips will follow once I get them edited & uploaded.

Dave

Thursday, August 11, 2011

Weather Watch.....

I am now watching the forecast for a suitable date to Launch The Lady Caroline.

The last of the "necessary" jobs are done.

I have still some nice to haves, but I gather than when you have a boat, the todo list never goes to Zero

I have a few things to get, including a stout bucket for bailing.

But Ultimately, I'm ready to go sailing.


Thursday, August 04, 2011

More or less ready

I have put in most of the Buoyancy, I have just the bow bag to do. (1 evening)

I have finished the fittings, including the self-bailers.

I have still to put on 3 mooring cleats, (2 bolts & 1 backing plate each - 1 evening for the three)

And to sort out the trailer board for towing, (1 evening)
and a holder for the mast. (? not sure about this)

I'm now gathering things like a paddle, flares, Life Jackets, a bucket, etc to get the boat ready.

But I'm, no longer building a boat, now I'm getting it ready for launch.

Watch this space for photos in the water.
And maybe even a short video or two.

Sadly, I do realise that I will have to do a capsize test, and an swamping test. Neither of these are going to be a whole lot of fun. I'm thinking wet suits and a sunny day, which may mean next season.

D

Tuesday, August 02, 2011

Our Survey Said....

The boat is now surveyed (a requirement for the insurance) and the surveyor has declared it "built to a very good standard of workmanship"

Ps, A word to the wise, plan where the deck fittings will go before you put in any screws which might be in the way. Otherwise Sods law will ensure that you have drilled 3 of the 4 holes to mount a fitting before you find a screw in the way of the final hole...

Sunday, July 31, 2011

there's just a few more things

The engine mounts is done. Since the transom is angled, I made a rookie mistake and set the mount too low, then I had to fill the bolt holes and re-mount it higher. (Luckily I popped the engine into place with the mount dry fitted,  so at least I didn't have to clean up bedding compound.)

The Self Bailers are dry fitted. If you are ever mounting these, it's hard to drill holes square to the hull while lying on you back reaching under the trailer. So drill the holes from the side where they go through the bailer. (ie if it's an outside mount, drill from outside) otherwise it's hard to get things to line up.
It does take a moment to get up the courage to cut a big hole in the bottom of your boat. I did make up a test piece first with some scrap.

The bracket for the Jib was fun to mount. It is thru-bolted. Of course that means that you need to climb into the bow to put on and tighten the nuts. A 6'4" tall 200 lb man can fit in past the centerboard case, and under the deck. But for a few minutes, it was entirely unclear if the same man could climb back out again.

Thanks to Caroline for holding the screwdriver outside while I crawled inside.

(Yes, she is smaller, and would have fit easier into the bow, but there is a limit to how far I was prepared to push my luck.)

Tuesday, July 26, 2011

The weather got better, so I got some stuff done.


1 more coat of paint(1 evening)
*Flip her over and back onto the trailer(1 evening) Thanks Alan !
Bedding compound for the mast track & fittings (1 evening)  
Mount the rudder (1 evening)


Mount the Engine (1 evening)
Fit the drain plugs / self drainers (1 evening)
Mount the Hardware for the forstay and Jib (1 evening)


+ Repaint the deck, it looks pretty grubby.


This weekend is looking touch & go, but it's getting close....


* It's amazing what you can do with a ground anchor* (think gigantic corkscrew), a whole lot of rope, an A-Frame, and a figure of 8 descender, and a few double blocks. Oh yes, and a few packs of rubber kids play tiles to keep from scratching the paint to bits.


** Trees make good anchors too. Anything 10" in diameter or so is not going to budge under any loading I'm likely to apply.

Friday, July 15, 2011

The Lady Caroline in a Blue Dress


I finished painting, and had her covered about 3 minutes before a small shower. One more coat and she's going for a swim.

The todo list is down to

1 more coat of paint(1 evening)
Flip her over and back onto the trailer(1 evening)
Bedding compound for the mast track & fittings (1 evening)
Mount the Hardware for the forstay and Jib (1 evening)
Mount the rudder (1 evening)
Mount the Engine (1 evening)
Fit the drain plugs / self drainers (1 evening)

I also need to fit wooden trim/bumpers, but they can be added after her first sail.
Posted by Picasa

Thursday, July 14, 2011

Undercoat

A nice even mid grey.

I can almost feel the salt spray.
Posted by Picasa

Monday, July 11, 2011

Work in progress


Hopefully she will look a lot better shortly...
Posted by Picasa

And most of the high build primers ends up in the bin....

It's the weave of the fibreglass cloth.

You see you have to fill the weave.

So you paint on the high build. Then sand it off again. The hollows start to fill up with High build 2 part epoxy.

You could make up your own, but based on the smell (and after one whiff, I pulled out my organic respirator) you have epoxy, fine powder, and a whole lot of nasty solvent to keep it flowing. If you just mix up Epoxy and Filler, it's much harder to work with.

You can use a different colour each time. So it's easy to see when you have sanded enough. And the dark colours tend to have a very dark surface, and be less dark underneath when you sand them back. So you can tell when you have left some hollows.

I think I'm done with this last coat. I'll know after I sand it back.

Then I start painting proper.

I guess the 90% of the work in painting is prep is about right.

Right now the boat looks like a patchwork of white, grey and blue depending on the high and low spots. (Where high and low is measured in small fractions of a mm).

It could probably be made more fair at a larger scale, but hell, it's going to get scratched the first day it sees the water, so I'll go with the 10 feet rule.

If it looks good from 10 feet away, it's fine.

I want to go sailing THIS year.

Sunday, July 03, 2011

The Mast Track


When Monday comes, I need to order some more high build primer and wait for it to arrive. In the mean time, I set to work on the mast. The last big job there was the Mast Track.

It's all screwed into place.

I was a little worried about the join (the track only comes in 3 meter lengths), but I used and adjustable spanner to hold the two tracks in line while I screwed them down. I also ran some sand paper back and forth on the inside of the ends of the track to make a tiny bevel so there would be nothing for the slides to catch on if the pieces were slightly out of line.

The sail go up and down nicely.
Posted by Picasa

Buy cheap, buy twice....

My DIY Random Orbital Sander gave up the ghost. Sanding back the entire hull of 2 part high build epoxy was beyond it. So I went out and got the Makita one I should have gotten in the first place.

I have also found that the weave on the glass cloth is a lot harder to fill that I thought. I have 2 coats of high build epoxy primer sanded back, and there's a few spots that will need special attention. I see another tin or two of High build Primer applied with a brush to the affected areas.

I'm starting to tire of sanding.

D

Wednesday, June 15, 2011

The Painting has Started

The heavy filling is done, the first sanding is done.

I've started the undercoating. The stuff is a high build 2 part epoxy undercoat. It's got some manner of solvent in it cause it stinks something nasty. As soon as I opened the tin, I went straight for the Organic Respirator. Spread a litre of that stuff out and you really don't want to be leaning over it and breathing it in.

My set of Charts for the local waters arrived. Now I've started buying sailing stuff, not building stuff.

That alone is a big step.

Friday, June 03, 2011

Upside Down again

Thanks to Andy & Caroline for helping me to flip the boat and to Andy and Nick for helping me to pop it up on a stand.

The last sheet of fibre glass is done. Now I'm sanding and painting.

The mast has it's first coat of Varnish, and before I flipped the boat I added various fitting like the eyes for the main sheet traveller, and the jib sheet leads.

There's 3 liters of EasyFair fairing compound on the way, I had not realised how much the glass cloth would "print" through the epoxy, and mixing up your own fairing compound is dusty, messy and expensive.

The todo list is getting very short these days.

In truth, It could go in the water without being painted, but I've waited this long.

Wednesday, May 18, 2011

I should have done this when I was assembling the CB case

The randomness of the weather, children, Maths projects and life in general has slowed work on the boat.

I did manage to fit the Centreboard Case Cover, and the Centreboard Pin Covers. The Case Cover was easy. The Pin Covers not so.

It would have taken about 30 seconds to drill the pilot holes for the screws before the Centreboard case was installed in the boat. The Covers are very close to the hull, which is of course angled upwards.

Good luck getting a drill in there, or even a 90 degree adapter for your drill. In the end I used a 45 degree adaptor for a power screwdriver (much smaller) and a drill bit with a Hex Adapter built onto it, and I had to cut the drill bit short.

Then to get the screws in, I used a ratchet screwdriver with the 45 degree adapter. Using a power screwdriver risked making much of the screw head, and getting a messed up screw out from there was not going to be fun.

The first Pin Cover took about 2 hours ! It involved a lot of trial and error. Particularly the error part.

The second, about 20 minutes.

You can get ratchet offset screwdrivers and I see one of these going into my tool kit. Should there be any problem with the CB which required removing the cover, I'd be toast without one.

D

Monday, May 02, 2011

Experience is what you get just after you need it.

Or experience is what you get when you do something wrong....

Either way, now, I'm pretty good at dealing with poly-sulphide bedding. Now that the four coamings are in place:

I know that if the tape is too close to the wood for the radius of your bead, then the bedding will be quite thick on the tape and you leave a nice groove when you pull the tape out.

I know that for the brand I used, 5-8 minutes is about right to lift the tape, sooner and it's still to runny. Later and it tears.

I know that you should use 2" masking tape, not 1", as the bedding will surely get out over the 1" tape when you are not paying attention to something.

I know that you should not try to fix any problem once you have lifted the masking tape.

I know all these things now.

It would have made for a better job if I'd known them all at the start.

The unfortunate thing is that reading about these things only helps a little. There is no way to learn that is quite as good as Experience.

Also you will find that the notched spreaders used for spreading tiling cement are prefect for spreading bedding compound.

You can get them for close to nothing, which is good, 'cause I for one would not want to try to clean the poly-sulphide off them.

What was that old line? Son, if you're going to insist on making all your own mistakes, you'd better get cracking, you have a lot of work to do.

Monday, April 25, 2011

Sails Up


To figure out exacly where the boom needs to be attached, you need to raise the Main Sail.


And to figure out where the jibsheet leads need to go, you need to raise the Jib.

It helps that there was virtually no breeze once it started to get dark.

A splash in June looks at least credible now.
Posted by Picasa

The mast is Up

With a little help from my supervisor.
I managed to get the mast upright.
And I made up the wire stays in place.
It all worked quite well.
But it could do with a little varnish I guess.
Posted by Picasa

Sunday, April 24, 2011

Awkward big feckin' stick

My first attempt to step the mast ended rather quickly when I realised I had no way of stopping it from swaying from side to side. It was a bare inch out of the bracket when it became obvious that disaster was beckoning.

For all the remaining lifts, I moved car more than 20' away from the boat !!!

I used a 4 part block and tackle and a 5' gin pole to give me leverage.

Round 2 involved putting 2 dead eyes into the deck. (Since the mast base is over a beam, the dead eyes are screwed into oak, with 1 1/2" screws (ie they ain't coming out any time soon). A pair of tangs about 6' up and some 8mm double braid sorted out the whole side to side thing.

For any such braces, they must be attached in line with the point where the mast pivots.

My second attempt left me realising that a certain amount of give in the two mini side stays would help a lot.

Eventually after a lot of raising and lowering I had the mast approximately vertical, and in it's step.

The step suffers quite badly from the whole operation, I see the need for some form of pivot.

I used some light rope as temporary stays until I get the wire ones sized. But I am now a little concerned about how I would adjust the side stays with a 20' mast hanging out of them.

I am leaning away from peg and pin adjusters to just using good old fashion lashings which can be infinitely adjusted, and can be loosened or tightened without disconnecting them.

Photos will follow, hopefully of a vertical mast, rather than a scene of devastation.

Saturday, April 16, 2011

A mast Step...

I made up a mast step. It's just half lapped joins, on a plywood base. The plywood is mostly just to give it an extra 1/4" of height, but the alternating grain won't hurt the strength of the step. I thought it turned out quite well.
Posted by Picasa

Wednesday, April 13, 2011

Ticking them off

The todo items that is
  • Glue the mast
  • Plane the mast after gluing and & Round the corners 
  • Sand the mast 
  • install the hardware
    • rudder fittings need bedding
    • standing rigging
The mast step's mostly done.
Varnishing a 20' long mast out of doors is going to require a little bit of thought...

Wednesday, April 06, 2011

Plaining the Mast

When you glue up a pair of 20' long sticks to make a mast, there's going to be a bit of work with a plane to be done afterwards.

You could use a Power Planer, except that :
  • It's noisy
  • You have to wear Ear Protection.
  • You can't listen to music.
  • It makes a mess (dust and chippings by the bin load).
  • The wood dust means you need to wear a mask.
  • And the dust gets right into your very soul.
  • Your neighbours won't feel the love if you fire up a power planer in the late evening.
  • Power Planers are about as subtle as a Felling Axe.
So out came the Stanley jack plane.

It does have a Hock Blade, (a +4 sharpness modifier).

And I have gotten to the stage where I can sharpen and hone a blade to the point of shaving with it.
You'd be surprised at the difference this makes.

After about 2 hours, swapping between each arm, and alternating between pushing the plane, and pulling it Japanese Style I now have a mast which would no longer looks like builders waste.

That may be an easy task for a Full Time Carpenter, but a 2 hour workout (with breaks to hone the blade) is a lot for a guy who pushes keys for a living.

One thing to note:

Everyone says it 'cause it's true: sharpen more often. 

Every time I honed the blade, I thought "damn, I should have done that 10 minutes ago".

However, as you need to take off the Plane Iron Cap to sharpen / hone, you need to reset the blade each time.

To reset the blade, put the plane down on a flat wooden surface, put the blade into the plane but do not clamp it. Adjust it so that it's resting on the wood. Push it gently down into the wood with your thumb. Clamp the blade. Now that the blade is more or less in the right place it's just fine tuning.

Thursday, March 24, 2011

Thoughts on 5 years of building a boat....

Someone asked me recently if I'd gotten what I wanted out of building my boat.....

I could have just bought a second hand dinghy for a couple of grand, less than I've spent in tools, materials, etc.
But I wanted to build a boat.

It's taken 5 years, and now it's nearly finished.
I could have played golf, and now I'd have a nothing but pitiful handicap and a load of expensive sticks to show for it. And as someone pointed out on one of the forums, it would still have taken me 5 years not to build it.

It has taken up a lot of my free time. (and time that really was not so free)
Yes, but I could have spent the time watching TV instead. But I grew up watching "Why Don't You?"
so I did.

Soon I'll get to put up the mast and see the sails up.

Then a little while later, I'll get to float it.

I'm looking forward to that.

There's lots of things I would change, now that I have the experience that I needed when I started. But I wouldn't go back and not build it.

Thanks Caroline, for putting up with me, and for giving me the time to do this. I could not have done it without your support. You may not have turned a single screw, or cut a single piece of wood, but this boat would not be here without your support. I'd have given up and used it for firewood a long time ago without you.

Dave

Tuesday, March 22, 2011

ToDo List

The pieces for the mast are cut, but still have to

  • Glue the mast
  • Plane the mast after gluing and & Round the corners
  • Sand the mast
  • Install sail tracks.
  • Varnish the mast
  • Varnish the boom
  • 1 panel of the hull still needs glassing
  • Paint the hull
  • install the hardware
    • rudder fittings need bedding
    • standing rigging
    • running rigging
    • various cleats
  • Install Centreboard Case Cover
  • Buoyancy bags
  • Add some form of rubbing strip where the deck joins the hull
So I should be in the water this year !!

Coamings & Paint


 At least there's paint on the deck now, and coamings cut and clamped in place.

 They look pretty good, for an amatuer.

Any my new temporary boat tent, so that I can paint the boat.

Friday, March 11, 2011

Just one thing.....

When you are tired, it's hard to get motivated to go out and work on the boat. The TV and the Couch beckon, and you can "flop and veg".

But if there's just one little thing that you can do in the shed, that gets you out there. So last night I cut a set of bolts to size, drilled out the countersunk holes in the cleats, made up backing pads for the cleats, drilled out a whole pile of washers. (I bought a box of 100 stainless washers, but I got the smallest size. I can drill them out if I need larger. Buying a pack of 5 of them costs nearly as much as a box of 100)

In the end, out of a tired evening when I might have simply flicked through the stuff that passes for entertainment, (The Boss, 57 channels and nothing on), I moved another little step closer to launch day.

Sunday, February 27, 2011

How the floorboards are held down....

I was asked how the floorboards are held down....

There's a Jamb Cleat on the frame, and a wooden "hook" on the underside of the floorboard.

The cord goes up behind the hook, around the bottom of the jamb cleat, around the cleat and pull.

You can see in the second picture, the Jamb Cleat is simply a piece of wood cut so that where it meets the oak frame, it makes a very narrow triangular gap. As the cord is pulled tight, it traps itself.

Simple as that. There may be better ways, but that's cheap, and it works.


Monday, February 07, 2011

Cleat Envy

Ok, the first attempt at cleats were functional, but frankly, ugly.


A quick post to http://forum.woodenboat.com/ and I have a much better Idea of what I wanted.

Longer bases, for strength, lower, and more rounded.
Posted by Picasa

Sunday, February 06, 2011

A simple cut off saw.


Since I don't really need a metal cut off saw all that often, and I have little room for more tools, I cobbled this together. It's just an angle grinder, and a sled. The sled is constrained by runners, so it moves in a straight line.
The Cutting blade is close enough to square to the table for my purposes.

I tried it out by cutting a hollow steel rod at 45 degrees, and then flipping the parts to join them at 90 degrees. It works just fine.

Yes, that is an old bread board.
Posted by Picasa

Sunday, January 23, 2011

The Coamings


So I have started working on the Coamings. I can't claim the carving, I tried some smaller work, and it came out fine, but my practice pieces on larger letters were less consistent. So I sent the coaming to Wood Graphics Ireland who did a nice job.


Of course cutting to fit is a job and a half, since you have compound angles and a curve.


But I need to figure out how to join the ends

Sunday, January 16, 2011

Making More Cleats


You can see the blanks here, the curves are cut on a drill stand with a 20mm Forstner bit. ThenI cut the horns before putting a 1/12 slope on each side. Of course, with my new found confidence, I made the base a little too short, but since they are for a 14' sailing dinghy, they should cope ok.


A rasp and a belt sander clamped upside down on a table with an 80 grit belt will do most of the shaping, and then you cut strips of a sanding belt and do the insides of the curve shoe shiner fashion.
Posted by Picasa

Friday, January 14, 2011

Making Cleats


Ok, so it took about 2 hours to make this, and it turned out a little thin on top. But since it's only going to hold the centerboard pennant, it should be fine.

Now that I have an Idea what I am doing, I think I will be able to churn one out in about 15 minutes.


  • A simple guide on the drill press means I can cut the holes for the curves without carefully measuring each block.
  • The order of cutting on the bandsaw is all important when some of the cuts are not at 90 degrees.
  • It's a lot easier to round the end of the cleat on a sander than on a bandsaw.
  • When you are joining a curve (20mm drill bit) and a straight line, don't try for a perfect tangent, cut inside the tangent, tidy up with sandpaper or a file.


It is still hard to explain why I spent all that time, instead of just buying a half a dozen nylon ones. At least it's hard to explain to some people.

Monday, January 03, 2011

The Drill bit

 
Posted by Picasa

One home made brazed drill bit. Not pretty, but it worked just fine.

Sunday, January 02, 2011

Tool Maker

All I needed was a 3/8" drill bit, about 2" long, and with a 1/4" hex fitting on the end. You see I could not get a drill in to the gap, so I'd have to use a ratchet with a hex drive.

No problem, I have lots of long drill bits, lots of screwdriver bits, a grinder with a cutting wheel, a Propane/Butane torch (1610ºc / 2930ºf), and some brazing wire.

I chopped the drill bit short, chopped off the end of the screwdriver bit, covered the joint in flux, and cooked it a little. The brazing wire melted and slurped into the joint just like in the videos on you-tube, and suddenly I had a 2" drill bit with a hex drive. Not the prettiest joint in the world, and I doubt it would hold up to much abuse, but it was good enough to drill a hole by hand.

10 minutes later, I had the hole sorted out in the Centerboard case for the pin. And after a little playing about, I had the Centerboard mounted.

Progress at last.