This weekend, I got to go out sailing twice (Thanks C), once in Ramor and once in Gowna. Two long narrow lakes, where the wind tends to blow along the length of the lake. Mostly I got to sail on my own, but I also took the little ones for a quick spin.
The winds were mostly light on both days, but I started with the main reefed, since I wanted to try shaking out a reef on the water to see how it went. I motored out from the dock, cut power and raised the main. Easy enough in light winds, but mostly I'm trying to build up experience of these things. I did end up drifting quite a lot further than I expected before I was up and sailing. Managing to tangle the jib sheet under the cross line for the Helm Impeder didn't help.
I also forget to remove the sail tie on my jib, so that meant a quick trip onto the fore-deck to untie it. Not something that I would have tried without my
Huntingford Helm Impeder.
It's nice being able to furl and unfurl the jib at will from the cockpit, but after losing the furling line, and having to make another trip to the fore-deck to retrieve it, I made it fast to the cleat. I really didn't want to loose that when I needed to get the jib down.
Now with my Huntingford Helm Impeder, I tried things like heaving too. Wonderful. I backed the jib, let out the boom, and pushed the tiller to the lee and TLC just nods slowly along making about 1 knot across the wind. I'm going to have to see how she behaves with a little more wind, but it's a step forward.
Shaking out the reef went perfectly, I just pointed her up into wind and let the main sheet loose. I had plenty of time to shake out the reef before she started to drift sideways. That might be more fun in a seaway.
I had my GPS on for some of the trip, but I'd turned tracking off (!?) so I don't have a track. Mostly I was making between 2 and 4.5 knots depending on the wind.
It's a long narrow lake, with the wind blowing down along the long side. There was a lot more wind in the centre of the lake, so as I tacked upwind, I'd slow down at each side, and pick up speed in the middle. Towards the end of my sailing, I spotted a bank of rain coming in and I guessed the winds would pick up. I dropped sail. I do need a topping lift to keep the boom out of the way when I drop the main, and some ties to keep it neat (I used a short spare line to tidy it up a bit). Then I motored back. I could have sailed, but today was about trying things out. I wanted to see how fast I'd go under power. With the Suzi 2.5 four stroke, I was making 3.5 knots with 1/4 throttle, and 4.5 knots at 1/2 throttle, and 5 knots flat out.
One thing that was bothering me was that I was not really doing very well upwind. I was close reaching at best. I think that I was tacking through 120 degrees, if not more. I had the main and jib halyards pulled pretty tight, apparently that moves the camber of the sail forward, which is bad for reaching. I have much reading to do.
I met John up at the sailing club at the sailing club at the Lakeside Manor Hotel, and he kindly let me used the Clubs pontoons. So first time to tie up at a pontoon, and my new fenders got their first outing. They worked perfectly.
Also, one thing about being around the water is that people are so helpful, even before I started struggling to bring TLC back up the ramp I have a helper, who joined in again when I was having a hard time getting the dolly back up on the road trailer.
The next day I arrived at Gowna, and was half thinking of just going home. There was no wind to speak of. But I reckoned that it would get better, so I set up. 45 minutes later as I was ready to launch there was at least what could be called a light wind.
It seems that it's not a sailing day without a goof. It turns out that if you push off from the shore without putting the rudder down into it's gudgeons, that you can't really sail so very well. Luckily there was just shallows to drift back into while I sorted it all out.
Again I tacked back and forth across a narrow lake trying to make some distance up wind, and not getting so very far. I'm quite sure that my lack of sailing ability has a lot to do with it, and the Glen L 14 is quite a simple boat without go-faster goodies. I suspect that she won't point like a race boat, but I think she can be coaxed to do a lot better.
With jib and main flying in, I was mostly making 3-4 knots until I came to a place where the lake narrows. At that point as I came out to the middle, the wind picked up and TLC took off. I had to head up into the wind at first, and then ease the main as TLC healed over. I'm sure that it was not even close to a capsize, but I wanted to gain experience slowly, and while I want to see just what it takes to capsize her, and how easy she is to right, I was thinking wet suit and rescue boat for that.
After I looked at the max speed on the GPS and it was showing 7.5 knots. I'm not sure if that was genuine, but she really did move.
Also in the gust as I headed up, she did not luff, she just powered along. Would it make sense that it's harder to go upwind in lighter winds?
Anyhow, at that point I headed back to meet my family who had just arrived and took the noisy ones along for a quick trip. Give kids jobs, and keep the sailing short. Better that they complain you are going in too soon, than that they want to go back. Even being the one who reads the speed on the GPS is an important job when you are 6.
I have a bit of reading to do about sail trim. I also want to make a new mast. Perhaps a straight mast will help her upwind performance, and I need to see if I can find a more experienced sailor who will risk life and limb aboard a home built boat :-) to teach me how to make it go.
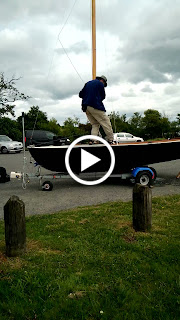
And since it didn't happen without pictures...
Ok, so that one was when I was doing about 2 knots, but I was hardly about to pull out my phone when I was trying not to capsize.