I've added a topping lift to TLC. That helps a lot for motoring.
It was quiet gusty (for my skill level) when I took TLC out on Friday, so when the little ones arrived later for a spin, I dropped sail, and tied it up with some bungy cord & toggle button sail ties, also newly made, and popped the boom up out of the way with the topping lift. Then we motored out around the lake for a bit.
We made it up to the narrow part of the lake that I'd been sailing towards. The wind fairly funnels down through that gap, on the way back under jib alone I was doing a little over 4 knots through their. We circled a small island, now named "Lonely Island" by the children.
TLC has a road trailer, with a launching trolley on top. There is a roll bar at the back of the road trailer make it easy to pull up the launching trolley. While heading down to the lake, the bracket that held on the roll bar broke off, dropping the boat down about 1", and leaving the roll bar dragging on the road. I managed a jury rig repair to get the boat to the lake and then took the roll bar off completely. Luckily I'd added a winch to the road trolley, or it would have been a lot of fun dragging the trolley up onto the trailer.
When I got home I had to grind off the galvanising and then weld on a new bracket and paint it. All is well but the only metal paint I had is bring red, so it looks like my trailer is splashed in fresh blood!
From looking at the metal where the bracket had been, it looked like there was a bad weld which had been ground off (a very clear grinder gouge) and the new weld on top of that was cold (the weld just broke off, leaving only a couple of marks where it had actually been attached to the main trolley. I'm not impressed with their welding skills. TLC has probably done less than 600 miles on that trolley.
Sunday, August 28, 2016
Monday, August 01, 2016
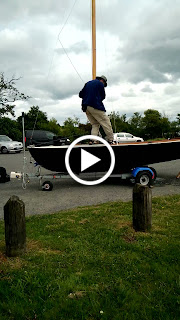
Lowering the Mast
It's a whole lot easier now. If you look under the stern, you can see a small wooden stand that keeps the boat from tipping back as I walk aft of the trailer wheels.
I just run a line from the fore-stay through the bow plate to the mast. Then I can release the fore stay from the bottle screw, and it's held at the mast. Once I am ready to drop the mast I release the line holding the forestay and just ease it back.
No more A Frame and pulleys.
I'm not at all sure I will be able to do this in 20 years time, but it's good for now.
I got to go sailing...
This weekend, I got to go out sailing twice (Thanks C), once in Ramor and once in Gowna. Two long narrow lakes, where the wind tends to blow along the length of the lake. Mostly I got to sail on my own, but I also took the little ones for a quick spin.
The winds were mostly light on both days, but I started with the main reefed, since I wanted to try shaking out a reef on the water to see how it went. I motored out from the dock, cut power and raised the main. Easy enough in light winds, but mostly I'm trying to build up experience of these things. I did end up drifting quite a lot further than I expected before I was up and sailing. Managing to tangle the jib sheet under the cross line for the Helm Impeder didn't help.
I also forget to remove the sail tie on my jib, so that meant a quick trip onto the fore-deck to untie it. Not something that I would have tried without my Huntingford Helm Impeder.
It's nice being able to furl and unfurl the jib at will from the cockpit, but after losing the furling line, and having to make another trip to the fore-deck to retrieve it, I made it fast to the cleat. I really didn't want to loose that when I needed to get the jib down.
Now with my Huntingford Helm Impeder, I tried things like heaving too. Wonderful. I backed the jib, let out the boom, and pushed the tiller to the lee and TLC just nods slowly along making about 1 knot across the wind. I'm going to have to see how she behaves with a little more wind, but it's a step forward.
Shaking out the reef went perfectly, I just pointed her up into wind and let the main sheet loose. I had plenty of time to shake out the reef before she started to drift sideways. That might be more fun in a seaway.
I had my GPS on for some of the trip, but I'd turned tracking off (!?) so I don't have a track. Mostly I was making between 2 and 4.5 knots depending on the wind.
It's a long narrow lake, with the wind blowing down along the long side. There was a lot more wind in the centre of the lake, so as I tacked upwind, I'd slow down at each side, and pick up speed in the middle. Towards the end of my sailing, I spotted a bank of rain coming in and I guessed the winds would pick up. I dropped sail. I do need a topping lift to keep the boom out of the way when I drop the main, and some ties to keep it neat (I used a short spare line to tidy it up a bit). Then I motored back. I could have sailed, but today was about trying things out. I wanted to see how fast I'd go under power. With the Suzi 2.5 four stroke, I was making 3.5 knots with 1/4 throttle, and 4.5 knots at 1/2 throttle, and 5 knots flat out.
One thing that was bothering me was that I was not really doing very well upwind. I was close reaching at best. I think that I was tacking through 120 degrees, if not more. I had the main and jib halyards pulled pretty tight, apparently that moves the camber of the sail forward, which is bad for reaching. I have much reading to do.
I met John up at the sailing club at the sailing club at the Lakeside Manor Hotel, and he kindly let me used the Clubs pontoons. So first time to tie up at a pontoon, and my new fenders got their first outing. They worked perfectly.
Also, one thing about being around the water is that people are so helpful, even before I started struggling to bring TLC back up the ramp I have a helper, who joined in again when I was having a hard time getting the dolly back up on the road trailer.
The next day I arrived at Gowna, and was half thinking of just going home. There was no wind to speak of. But I reckoned that it would get better, so I set up. 45 minutes later as I was ready to launch there was at least what could be called a light wind.
It seems that it's not a sailing day without a goof. It turns out that if you push off from the shore without putting the rudder down into it's gudgeons, that you can't really sail so very well. Luckily there was just shallows to drift back into while I sorted it all out.
Again I tacked back and forth across a narrow lake trying to make some distance up wind, and not getting so very far. I'm quite sure that my lack of sailing ability has a lot to do with it, and the Glen L 14 is quite a simple boat without go-faster goodies. I suspect that she won't point like a race boat, but I think she can be coaxed to do a lot better.
With jib and main flying in, I was mostly making 3-4 knots until I came to a place where the lake narrows. At that point as I came out to the middle, the wind picked up and TLC took off. I had to head up into the wind at first, and then ease the main as TLC healed over. I'm sure that it was not even close to a capsize, but I wanted to gain experience slowly, and while I want to see just what it takes to capsize her, and how easy she is to right, I was thinking wet suit and rescue boat for that.
After I looked at the max speed on the GPS and it was showing 7.5 knots. I'm not sure if that was genuine, but she really did move.
Also in the gust as I headed up, she did not luff, she just powered along. Would it make sense that it's harder to go upwind in lighter winds?
Anyhow, at that point I headed back to meet my family who had just arrived and took the noisy ones along for a quick trip. Give kids jobs, and keep the sailing short. Better that they complain you are going in too soon, than that they want to go back. Even being the one who reads the speed on the GPS is an important job when you are 6.
I have a bit of reading to do about sail trim. I also want to make a new mast. Perhaps a straight mast will help her upwind performance, and I need to see if I can find a more experienced sailor who will risk life and limb aboard a home built boat :-) to teach me how to make it go.
And since it didn't happen without pictures...

Ok, so that one was when I was doing about 2 knots, but I was hardly about to pull out my phone when I was trying not to capsize.
Saturday, July 16, 2016
The bilge pump is installed...


I may later drill a hole through the seat support on the left there, to tidy things up, but right now the hose is down where you can't really stand anyway.
Tuesday, July 12, 2016
Start of bilge pump I installation.

More pics will follow when I have installed the hose. The inlet will be across the boat on the Lee side so that I can pump from the windward side. There's only one pump so if I'm on the other tack I will need to heave to.
Sunday, June 05, 2016
First sail of summer, new toys tried out
Cavan is supposed to have one lake for each day of the year, if you look at a map, it could well be true. There is a nice spot near Gowna where you can launch into either of two lakes. I've been there a couple of times and it's easy to launch and retrieve.
I nearly called it quits, there was no wind as I set up, but I don't often get the boat out, so I'd motor if I had to.
This was the first time setting up the mast without pulleys and A frames. The mast is not all that heavy, however if you walk back to the back of the boat, the trailer will tip, and you can't lift a 22 foot mast 4 feet from the pivot.
I built a simple wooden support for under the back of the boat, so now I can walk to the stern, lift the mast and walk forward hand over hand and it's a done deal.
It worked so well that I raised the mast twice. (This had nothing at all to do with me forgetting to reeve the halyards before I raised the mast the first time. Sigh!)
The wind did pick up and by the time the family came down to join me I was sailing along nicely. A quick trip back to shore and I had three little passengers. The jib came down as there's too much to do to tend the jib and keep an eye on the passengers. At least too much until I get to sail more than twice a year.
(I have now sailed the boat at least once for each year spent building her!)
This was my first trip with my newly added Huntingford Helm Impeder. Every small boat should have one. It's not an autopilot, but it does allow you to take your hands off the tiller for a few moments.You can let go of the tiller for a few moments and it stays put. Very handy. Not quite an autopilot, but very handy.
The wind picked up a little and the occasional gusts unnerved my middle daughter, and reminded me to not cleat the main sheet, a small ratchet block is a nice luxury on a 14" sail boat.
At one point we seemed to stop making much progress, then I noticed the out haul had come uncleated, and the sail was getting pretty baggy. My out haul comes back in along the boom, via a line doubled through an eye, and passed through a captive clam cleat. This gives a 2:1 advantage, and the ability to sort it out from the mast end of the boom. One sharp tug and we were sorted.
Saturday, November 28, 2015
A Ditty Bag
After a fair bit of a search, I managed to get Heavy Canvas (ebay) and natural look polyester rope, sail makers needles, and waxed twine (Jimmy Green Chandlery).
This is what I ended up with.


So I se about making the ditty bag from "Sail Makers Apprentice". I had a few goofs, and I could not easily source brass thimbles, so I just whipped the cringles instead.


Given the length of time it took to make a simple canvas bag, I am quite glad that I simply bought my sails rather than tried to sew them up by hand.
It was very hard to make up a grommet in polyester the size of the bag. Retwisting the strands as you go is a must.
You also need to use some sort of bobbin to wrap the whipping thread around or it will take all day to do cringles and loops.
I am considering waxing the canvas so that I can actually use it rather than just have sit on a shelf. It's full of sail sewing kit right now. Hopefully I won't ever find myself needing to make repairs to get me home. I also think that I will get a big roll of self adhesive sail repair tape too.Tuesday, November 03, 2015
Rope Grommets
S'funny I work with pretty high tech stuff. so I play with old tech.
Everything from
Furnaces to wooden
sail boats.
I was reading The Riggers Apprentice and I came across Grommets. Nylon Rope is a poor starting point, but it was the only three strand I had. It simply does not hold it's lay, and it unravels faster than a middle east peace accord. I did soak it in a mix of water and hair gel - not sure that helped much, but it smells odd now. I also tied off each of the three strands with constrictor knots to stop each strand unravelling. The small one was my first try. I should have tapered the strands as I tucked them.
I did taper the strands on the second one, it came out a bit better.
A copy of The Sail Makers Apprentice just arrived, so I have reading material for a few weeks.

Thursday, September 24, 2015
Casting a new handle for a bilge pump.
The cockpit sole is removable, but not easily, so the pump can't go on the sole, nor under it.
I need it somewhere I can get at it while sailing, so I can pump and sail. Ideally on either tack, but that's asking a lot.
And sadly I bought a whale urchin, without a removable handle.
The pump will sort of fit in under the benches, but the handle sticks out. The original handle comes across the body of the pump... Not the direction that I needed.
 Annoyingly the 2 pivots are different sizes, you can't reverse the handle.
But since I have a furnace for casting aluminium or bronze, I measured up and made a new pump handle. Obligatory warning here, liquid aluminium is going to mess you up something special if things go wrong. If you want to play with molten metal, you need to do a lot of learning. if at first you don't succeed, perhaps foundry work is not for you...
 I used a hot wire cutter to make up the shape in expanded polystyrene (sorry no photo). This has a sprue of polystyrene attached, and it gets coated in plaster except for the very top. It's placed in sand with the sprue sticking out the top. You pour in the molten aluminium and it vaporises and replaces the polystyrene. Let it cool and you have an aluminium widget the exact shape of the polystyrene. I drilled holes for the pivots, and drilled and tapped a hole for the handle.


I need it somewhere I can get at it while sailing, so I can pump and sail. Ideally on either tack, but that's asking a lot.
And sadly I bought a whale urchin, without a removable handle.
The pump will sort of fit in under the benches, but the handle sticks out. The original handle comes across the body of the pump... Not the direction that I needed.

But since I have a furnace for casting aluminium or bronze, I measured up and made a new pump handle. Obligatory warning here, liquid aluminium is going to mess you up something special if things go wrong. If you want to play with molten metal, you need to do a lot of learning. if at first you don't succeed, perhaps foundry work is not for you...


The handle is made of wood, with a 10 mm stainless bolt screwed up inside it with the had cut off afterwards. Drilling a 75 mm long hole up inside it is a bit fiddly. I don't have a drill press so this was all done by eye.
The whipping helps reduce the chance of the handle splitting in use. The thread is 10 x 1.5mm so quite course, and it goes through 25 mm of aluminium, so it should be plenty strong.

This is how it looks now. I need to build a small platform under the seat to hold it just in the right place for the handle not to hit anything at either end of it's range.
If I polish it up, a lot of work, it will come out shiny and silky to the touch. I will probably get things working and then decide not to bother polishing it. A little metal paint may well suffice.
I could have bought a handle, and the pivot, but that would have cost silly money for something that I made up in an evening. Since it's solid aluminium, even with my less than perfect casting skills, it's vastly stronger than it needs to be.
It's not perfect, but it pumps just fine.
Sunday, September 06, 2015
Bits and pieces
I'm toying with the idea of remaking my mast. It's heavy and not quite straight. A birds mouth oval might be just the trick. Lighter, better looking, a diverting project.
On the other hand that does mean managing 20' long staves dripping in epoxy. And I have only got a small garden to work in.
In the mean time, I added a "Huntingford Helm Impeder" to The Lady Caroline. I have a simple loop in the cross string which I can pop over an aft cleat, and I can make the other end fast to the other aft cleat. I now have 3 monkey fists hanging off or around my tiller.
I also put together a couple of simple stands to go under the stern of the boat while she's on the trailer. These are simple A frames, with a hinged leg attached in the middle on one side. An eye bolt, some cord and a cleat prevents them from popping open on me. Some plywood pads spread the load. The pads are held in place with a simple rail screwed all around the underside. The rail allows them to be easily positions, but not to slide out.
With these under the stern, I can walk to right aft while TLC is on the trailer. That far back, gives me enough leverage to raise the mast by hand, instead of using an A-Frame and a block and tackle. This should take 10 to 15 minutes off rigging TLC. The simplicity of it also reduces the risk of the A frame slipping and the mast coming down with a bang.
I've looked really hard and I cannot see an easy way to add a way to row. The rowing seat would have to be on top of the Centreboard Case. I'm not sure that I want that amount of constantly changing stress there. Also, that would leave the block for the main sheet between my legs as I rowed.
I am thinking of trying a sculling oar instead. I am not quite the purist, and I'll use the outboard if need be, but if that were dead, having some sort of something would be nice. And it might be nice to have something less noisy for when there's not wind, and I'm not in much of a hurry.
 And finally, I'm about 3/4 through the Lugworm Chronicles. This is about a couple who took their Drascombe lugger by trailer to Greece around 1970, spent the summer living on the boat as they sailed around Greece, then wintered there, to sail back to the UK. It really is quite incredible, especially given that they did this before you could simply pop into a ATM anywhere in the world, before you could ask google to translate everything, and before you could pop up a website to get a decent weather forecast in the language of your choice.
It's well written, albeit sometimes it does feel like you need an open map beside you as you read. I'd recommend it.
On the other hand that does mean managing 20' long staves dripping in epoxy. And I have only got a small garden to work in.
In the mean time, I added a "Huntingford Helm Impeder" to The Lady Caroline. I have a simple loop in the cross string which I can pop over an aft cleat, and I can make the other end fast to the other aft cleat. I now have 3 monkey fists hanging off or around my tiller.
- The yellow will pull the rudder up. The basic design is here, page down a little.
- The red will pull it down and lock it with a pop-cleat, so it will release if I ground it.
- The blue will tension the helm impeder so the tiller can stay put.
With these under the stern, I can walk to right aft while TLC is on the trailer. That far back, gives me enough leverage to raise the mast by hand, instead of using an A-Frame and a block and tackle. This should take 10 to 15 minutes off rigging TLC. The simplicity of it also reduces the risk of the A frame slipping and the mast coming down with a bang.
I've looked really hard and I cannot see an easy way to add a way to row. The rowing seat would have to be on top of the Centreboard Case. I'm not sure that I want that amount of constantly changing stress there. Also, that would leave the block for the main sheet between my legs as I rowed.
I am thinking of trying a sculling oar instead. I am not quite the purist, and I'll use the outboard if need be, but if that were dead, having some sort of something would be nice. And it might be nice to have something less noisy for when there's not wind, and I'm not in much of a hurry.
And finally, I'm about 3/4 through the Lugworm Chronicles. This is about a couple who took their Drascombe lugger by trailer to Greece around 1970, spent the summer living on the boat as they sailed around Greece, then wintered there, to sail back to the UK. It really is quite incredible, especially given that they did this before you could simply pop into a ATM anywhere in the world, before you could ask google to translate everything, and before you could pop up a website to get a decent weather forecast in the language of your choice.It's well written, albeit sometimes it does feel like you need an open map beside you as you read. I'd recommend it.
Friday, August 14, 2015
First Carburettor Strip down and Rebuild...
I really should have photos on this, but I was up to my bits in... well little bits.
My Suzi DF 2.5 was quite unwell. She has only run for a bit, but she's spent 2 winters sitting in the shed. At first I could not even turn her over, but (with the kill cord removed) I spun the prop and then pulled the starter, rinse repeat until things freed up. I guess it just took a while to get oil all around it.
Then whoopee, she started.
But only with full choke, any attempt to touch the throttle, or take off the choke killed her dead.
Googling arrived at the realisation that the carb was probably gunk city. So a quick look at youtube and this video amongst many gave me a place to start.
One €10 can of carb cleaner, and a couple of aluminium foil trays to put the bits in, a set of socket spanners, and a few screwdrivers (including some quiet small ones for the jets) and it was time to open things up. (Nitrile gloves are good too, carb cleaner fluid is pretty harsh.)
There was less gunk than I expected, and I was starting to loose faith that this simple cleaning would make any difference, until I started on the jets. Remove and clean them one at a time, then you don't have to figure out which one goes back where!
The two main jets were fine, but the pilot jet was clearly not. It's hidden away under a screw - how does anything get in or out? Clearly something does. The pilot jet was completely blocked. No light at all. I left it sitting in carb cleaner while I had lunch, then gently poked it with a very fine needle. Eureka. I saw the light.
Then the "put it back together game". As I disassembled it, I'd "looked back" to see how it would go back together. Pictures might have helped, but for the DF2.5 it's not that complicated.
Moment of truth, Choke, Pull, she lives.
Kill the choke, she dies. Oops, not enough throttle. Try again.
Choke, Pull, alive.
Some throttle, kill the choke, she's still running,
I wound the throttle in and out, and she revved up and down, Just Peachy.
I'm not sure what that would have cost me at the local Suzi Marine supplier, but it would have been a trip out, and another trip to collect, and I can't imagine getting away with less than €75?
But now I know a little more about engines. I suspect that this will be an annual event given how tiny the pilot jet is. Pictures next time....
How a Carb works...
Thursday, August 13, 2015
Sailing in Clare
After spending so much time building a boat, I have learned that it's much easier to steal an hour or three to work on the boat, than to steel an entire day to go sailing. But on this trip to Clare with the family, a day presented for me to go sailing, by myself.
The sea is a very different place, with tides and proper waves. At first I found a lovely place to launch from, Bell Harbour, only to find it dries for a good portion of the tide. Also, as you come out to the sea proper, the entire body of water funnels through a small channel. Not a place to be in a small open boat unless you are within an hour of high tide.
Ballyvaughan however has a slip, which is good at all time of the tide except the lower end of the springs. It's quite steep, but there were a few local lads, who were kind enough to help me getting The Lady Caroline down, and back up again later.
Now I have built a boat, and sailed it once or twice, but sailing is still a learning thing for me. I really must remember to close the self-bailers before launching the boat.
For single handing, I need to add some sort of rudder lock. I also need to learn to heave too, but given that there was a short steep swell, and at times I was close to picking up a bath full of sea water over the side, it seemed the wrong time to try that out.
My little Garmin showed my speed, which I tried to use to see how setting my sails affected things, but with the swells and the gusts, it was quiet hopeless.
TLC did just fine. I did not fly the Jib, since I am still learning, and she does not point so very well without it, be we managed.
On the way out, when I hit the worst of the swell, my course was taking me directly parallel to the waves. This was a quite a lot less than fun, so I fell away a little, and then headed back up into the wind so that I was crossing the waves enough to keep things stable.
On the way back I came in along the coast a little more to avoid the worst of the swell, that put the shallow sand banks between me and the rest of the Atlantic.
My plans for the next trip are to try heaving too, try anchoring, and if I can sort out oars before then to see how I manage at rowing a little. TLC has a 6' beam, so she's won't be an easy row, but we should be able to manage.
 |
| Sailing In Clare |
"The cold rain makes it hard to see where the barren rock that passes for soil meets the bleak grey cloud. If this is summer what fell shadow must be cast on the soul of any man exiled to spend a winter in Clare?"
- Me, after a week in Clare in August
Tuesday, August 14, 2012
More Bike than Boat

The front gears are not yet set up, the rear are, the brakes work. As does the steering Some things I have noted...
- The bent plywood seat is SO much better than the original.
- Foam sleeping mats for camping are perfect for lining the bent plywood seat.
- The (very) tiny play in the linkage is not a problem at all.
- I had to "fix" the USS as the original steering tabs were effectively longer at the forks, resulting in a gearing effect. The wheel turned less than the bars. (not good)
- You can't easily move your body to balance. Counter Steering Helps a LOT. I learned this driving motorbikes. http://en.wikipedia.org/wiki/Countersteering
- It's way easier to start off down a slight hill.
- There's no suspension. I do appreciate that's obvious. But you can't lift up out of the saddle. I may "spring" the seat. I've seen suspension seats for normal bikes. We shall see.
- The USS bars have a lot of leverage back and forth. Even tightening the bars a lot at the bracket does not stop me from moving them about if I push or pull to hard. I am thinking of welding them at a suitable angle.
- A VERY light hand on the USS bars makes the bike travel in a straight line. Less is MORE. Hauling out of the bars as you start off makes for a very short journey.
I like it. I like it a lot. It will need a little more work. Some tweaking. Lights, mudguards, pannier brackets, paint, etc. Once it's presentable I'll post some pics.
My welding needs a LOT of work. Right now I can make stuff stick, and it will hold against a car jack. But I'm scoring about 0.2 our of 10 for artistic merit, and that's only cause they hate to give you 0.It will take a bit of practice before I'm prepared to go out in traffic, and I need a decent helmet mirror.
plans, forum, tutorials etc. are here http://www.atomiczombie.com/
Tuesday, July 31, 2012
A little about welding..
Some good books
- Farm and Workshop Welding
- How to Weld: Techniques and Tips for Beginners and Pros (Motorbooks Workshop)
Phases of not being able to weld (just stick welding mild steel - lets not get silly just yet)
- Can't strike an ark
- Can't run a bead
- Can't run a neat bead
- Bead is (too high, too flat, undercuts the metal, laced with inclusions)
- Can't join metal at all
- Can break metal about with bare hands
- Can break metal with hammer
- Can sometimes break metal with hammer
- *Can't make neat weld to join metal
- Can't always make neat weld
- Take a lot of attempts to dial in the right settings on a different type of joint.
If I get past this list, I'll consider my self to be about "beginner" status.
I guess it's true of so many things. They seem simple until you start to learn about them, and then you find out how much is involved.
Some Simple Ideas
(Bear in mind I'm an utter novice, so this has very little authority behind it)Too cold, you only join the surface. Too hot you burn through.
Too Hot, Speed Up to compensate, and you don't deposit enough metal, you get undercutting.
Too Cold, Slow down to compensate, you end up with too much metal, and inclusions from the slag getting around you.
As you run a weld, the metal heats up, at the start it's stone code. Circle at start for a second before you start moving.
On thin stuff you need to do short welds, then let it cool. Repeat.
More weld material does not make a weld stronger, a nice convex fillet is stronger than a blob as the blob introduces a sudden change in thickness of metal, which is a stress point. The weld is stronger, the joint is weaker. It will break at the edge of the blob.
Buy an automatic helmet. As a beginner this makes a lot of difference.
* I'm about here, on a good day. With varying degrees of the preceding problems.
Monday, May 07, 2012
And now I'm learning to weld...
It's a long way from boats, but I'm planning on building a recumbent bike. See http://www.atomiczombie.com/
I've started learning to weld, there's tonnes of stuff out there, the good the bad and the ugly. Some of it is just plain wrong. The dedicated sites are better than instructables & such.
Ymmv, given that I don't know a whole pile about welding, do take my recommendations with a whole pile of salt.
I've started learning to weld, there's tonnes of stuff out there, the good the bad and the ugly. Some of it is just plain wrong. The dedicated sites are better than instructables & such.
Ymmv, given that I don't know a whole pile about welding, do take my recommendations with a whole pile of salt.
Tuesday, November 29, 2011
Winter List
No boat is ever finished, and I have my list for the winter....
- Brass rubbing strips on the rudder, centreboard and the front of the hull
- Cargo Netting for bits and pieces
- Fix the bow eye, it was too small and it bent
- Add a nose wheel to the launching trolley
- Add a winch to the trailer or trolley. This needs some thought, I want to make it easier to get the boat onto the trolley and the trolley onto the road trailer.
- Wooden Trim where the hull joins the deck. More sanding.
- Reapply oil to the seats, coamings etc.
- Put the wooden bungs in the screw holes in the coamings.
- Lazy jacks / topping lift
- See if I can improve set up time for the mast / sails. I think if I have something to support the stern while on the trolley, I can raise the mast by hand. We shall see.
- A mount for the GPS
- Bilge pump (or pumps) that I can use on either tack.
- A better way of stowing the outboard while towing.
There. Now I have a list.
It's longer than I thought it would be, but it'll get longer yet, lists always do.
Sunday, November 06, 2011
Sailing in November
My wife's family is from Cavan, and my parents have retired there too. So, on Friday we drove to Cavan, with the boat in tow. While my wife and the children visited her parents, I met my parents at the lake with the boat. (Thank you my love for the time you give me to sail.)
The lake was up about 4 - 6 feet over it's banks, which meant the car park was flooded to 18 inches. So I had to push the boat and trailer right through the (bitterly cold) water in the car park to get deep enough to launch it.
I'm now in my 40s, so Mom's claim to being 21 is not looking good, but she rolled up her trousers and waded knee deep into the lake to climb on board.
Her father was a Ship Builder in Arklow, and this was her first time going out sailing in a boat built by her son. The world turns.
It was also only my third time out in the boat. So her faith in me may be misplaced.
Using an A Frame, an open hinge, and temporary, sprung stays, I've hugely simplified hoisting the mast and setting up the boat, but it still takes about an hour. This time, I rigged the Jib for the first time. Up to now I'd only be flying the mainsail.
The lake was divided into regions of small waves, ripples, and of glass, depending on the lay of the land, and the shelter of the trees.
As you can see the lake is somewhat convoluted.
View Larger Map
Our journey went from the Bridge marked A above to the turn in the lake and back. Hardly an epic voyage, but an adventure nonetheless.
For the first time I popped up the Jib. It's on a rolling furler, and it was far easier to fly it and later stow it again than I'd expected.
Mom took the helm for a while, and we generally took it easy. In spite of it being the start of November, it was surprisingly warm, and the sky was blue, barely dotted with clouds.
At one point we tacked back and forth a few times to clear a copse of sunken trees whose crowns were barely half clear of the water. With a pivoting centreboard, and pop up rudder, I fear no shallows, but tangling with those trees could have left us stuck, but in deep enough water that getting out to push off was not an option.
I had not turned on the GPS so I've no idea how fast we were going. It was light enough air that we could sit one each side and sail without any concern of capsizing. There was a noticeable increase in speed when we flew the Jib. At times we "flew along", but when we passed through the shadows of the trees, we had to look at our wake to be sure we were moving at all.
The return to our launch site was narrow, close to the wind, and in shelter. After slowing to a halt and drifting back and sideways twice, I relented and used the outboard engine to take us in to where I could jump out
I'd like to say a big thanks to my father, who in spite of not having any wish to board any boat which is not large enough to have a choice of restaurants, did help me set up and tear down the boat, and sat reading in the car awaiting our safe return.
These lakes will be my sailing grounds for a while, and there's more than enough to explore. As the kids get older, there's plenty of "pirate coves" and "magic islands". I think I'll need to order "The Swallows and The Amazons".
Monday, September 26, 2011
A new toy
I picked up a Ceramic Folding Knife on the internet. $49 + $5 postage - from Canada to Ireland. Nice, usually postage makes things like that prohibitively expensive.
You can see them at http://www.ceramicknife.org/

The handle is stainless, the blade is ceramic. It's held together with tiny recessed bolts, so you can take the whole thing apart if you even need to. (Not that there's anything to go wrong).
It clicks closed, so it won't pop open accidentally. And it locks open.
It feels light, but not in any way flimsy. It takes a little practice to pop it open without your thumb getting too close to the blade, it sort of pops, and your thumb can slip of the stud. The blade is only an inch wide, if the back of the blade was a bit wider, there'd be more room for the thumb stud.
On the whole a very nice toy. I can't help thinking my modified Myrchin will still be my go too knife on the boat, 'cause I know it's bullet proof. But I suspect that this one will have it's place too. I just want to see how resilient it is.
But on the whole nice toy.
You can see them at http://www.ceramicknife.org/

It's about as sharp as you will make a steel knife without taking a strop to it. That is it slices paper like all the demos you see on youtube, it won't shave the hair off the back of your arm, but, it will slice through 8mm poly double braid without any fuss at all. (Which is more important than shaving your arm bald!)
It clicks closed, so it won't pop open accidentally. And it locks open.
It feels light, but not in any way flimsy. It takes a little practice to pop it open without your thumb getting too close to the blade, it sort of pops, and your thumb can slip of the stud. The blade is only an inch wide, if the back of the blade was a bit wider, there'd be more room for the thumb stud.
On the whole a very nice toy. I can't help thinking my modified Myrchin will still be my go too knife on the boat, 'cause I know it's bullet proof. But I suspect that this one will have it's place too. I just want to see how resilient it is.
But on the whole nice toy.
Sunday, September 25, 2011
Cutting Rope
I have a Myrchin P300 knife. It's really quite nice. But the serrations are very aggressive.
This means that
So I got out my coarse diamond stones, and ground down the serrations on the Myrchin until they were less like a comb! Then I sharpened it (with a spyderco sharpmaker), and just because I could, I honed the blade on a cheapo cloth wheel powered by a drill with some polishing compound.
My Myrchin now cuts through the 8mm poly with callous disregarding ease. It sits nicely in my pocket, it has a pliers, and a locking marlin spike. And now it has the blade that I'd have put on it. It does not look nearly as scary as the original blade. But when your hands are cold, you are tired, and something is tangled, if you want to "untangle" it, you don't care much for how scary the blade looks.
This means that
- It catches in the rope if you try to cut rope.
- I can't sharpen it very well (ymmv)
- At the end of it all, I take 3 serious attempts to cut 8mm double braid.
So I got out my coarse diamond stones, and ground down the serrations on the Myrchin until they were less like a comb! Then I sharpened it (with a spyderco sharpmaker), and just because I could, I honed the blade on a cheapo cloth wheel powered by a drill with some polishing compound.
My Myrchin now cuts through the 8mm poly with callous disregarding ease. It sits nicely in my pocket, it has a pliers, and a locking marlin spike. And now it has the blade that I'd have put on it. It does not look nearly as scary as the original blade. But when your hands are cold, you are tired, and something is tangled, if you want to "untangle" it, you don't care much for how scary the blade looks.
Monday, September 19, 2011
Well that didn't suck !
The wooden pump sucks water just fine, provided that it's either in water, or primed. It won't self prime more than about 3" or so. I could see the water climb about 3" through the clear plastic hose. No More.
I guess that while the clearance of the piston, and the valves was just fine for water, air just flows past them. I could do a better job, and add seals, and improve the valves, but now the engineering is starting to get to the stage where it's very time consuming, and fragile.
So, I'm just glad that I only made a mock-up, and did not spend a lot of time making it pretty.
Oh well.
Some you win.
Subscribe to:
Posts (Atom)

